Campaign images displayed on Careers.Vic must be resized and formatted to ensure they are consistent with the website's design and branding standards. Resizing the image ensures it displays correctly across different devices, maintains the required aspect ratio.
The steps below outlines how to use the Careers.Vic image template in Photopea to prepare campaign images for publication.
- Download the following template from SharePoint: Campaign image background template.psd
- Open Photopea.
- Select File > Open.
- Browse to and select Campaign image background template.psd from your Downloads folder.
- Click Open.
- The template will open with a placeholder image already included.
- Save the image provided by the organisation in the Recruitment Campaign workspace in SharePoint.
- Copy the image provided by the organisation.
- Paste the image into the template.
- Resize and position the image so that it fills the green template area. The image should extend slightly beyond the edges of the green box to ensure full coverage.
- In the Layers panel, click the eye icon next to Layer 1 to hide the placeholder image.
- Drag Layer 2 below the Fade layer so that the fade effect is applied to the image.
- Review the image to ensure it is correctly positioned and displays as expected.
- Select File > Export As > PNG.
- Enter an appropriate filename in the Name field.
- Click Save.
- The PNG file will be saved to your Downloads folder.
If you wish to create the image manually, follow the steps below to resize the image using Photopea.
- Check the background header image.
- Go to an existing recruitment campaign page.
- Right mouse click on the image background -> select 'open image in new tab'.
- When it opens, right mouse click on the image and select 'Inspect'.
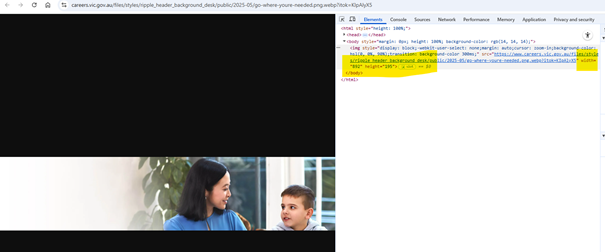
- It will show the dimensions of the image:
- Open https://www.photopea.com/ (free editing tool).
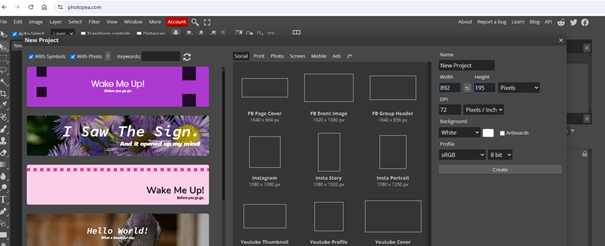
- Click on New project.
- Enter dimensions of width 892 and height of 195 (as per source code above).
- Click on Create.
- Select File -> Open and Place
- Select the image the recruiter has provided.
- Proceed.
- The image should then be added in the middle of the canvas.
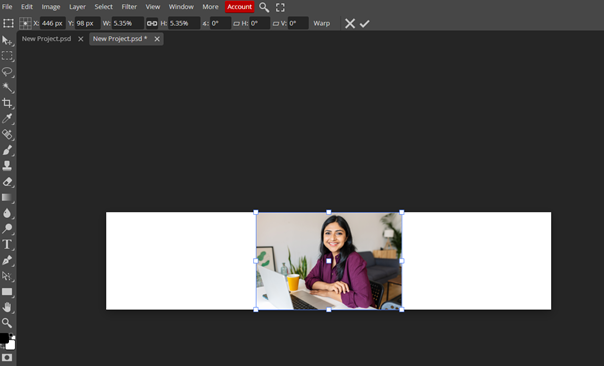
- Drag the image to the right slightly (as the title will be on the left side).
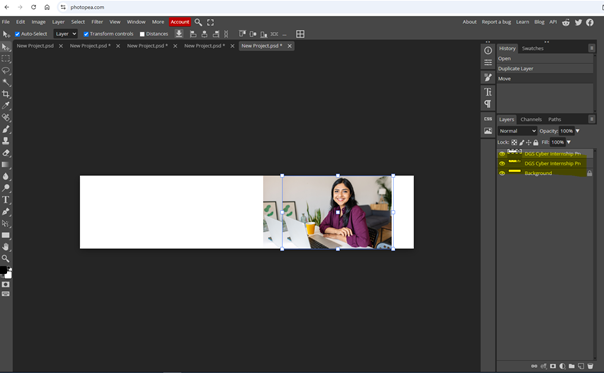
- On the right panel, the bottom section shows 'Background' and another layer which is the image you inserted.
- Right mouse click on the image you inserted and select 'Duplicate Layer'.
- The right hand side panel shows two layers.
- The bottom layer is the original.
- Click on the top layer. This will highlight the image in the main section.
- Drag slightly to the left.
- There are now two layers.
- Ensure the duplicate layer is highlighted and selected by clicking on it via the right panel.
- We now want to blur the extra panel for a distorted blur for the back ground image.
- From top menu, select Filter -> Blur -> Blur Gaussian
- Depending on the image, the above steps may need to be repeated.
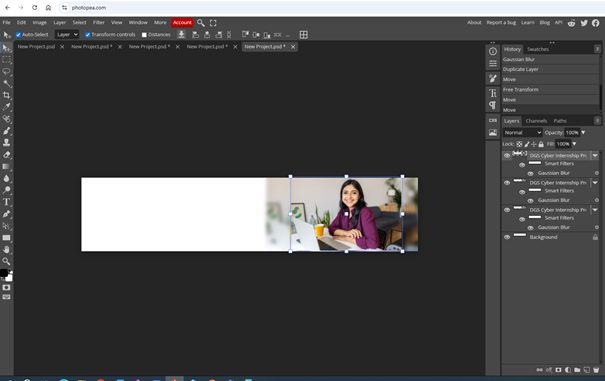
- Play around with the image until you are happy with the result.
- Save image by selecting File-> Export As -> Select JPG
- Enter in the file name.
- All documents for Recruitment Campaign should be stored in a new folder at this location: https://vicgov.sharepoint.com/sites/vpsc/SitePages/Workspaces/Recruitment%20campaigns.aspx
- Ensure the file is saved to the Sharepoint location.
Was this article helpful?
That’s Great!
Thank you for your feedback
Sorry! We couldn't be helpful
Thank you for your feedback
Feedback sent
We appreciate your effort and will try to fix the article